Country Loaf with Discard Sourdough Starter
This is not a post for people who have never made sourdough bread before. If that’s you, and you’re interested in learning to make sourdough bread, I recommend Tartine Bread, which is the book that really got me started on my sourdough adventure. Indeed, the method and instructions described below are based on the Basic Country Loaf recipe in Tartine Bread. (I created my starter using the instructions on the King Arthur Flour website, which is also a great resource if you’re new to sourdough baking.) If you already have some familiarity with sourdough baking, though, you at some point have probably wondered what to do with your excess starter–the starter that is “discarded” with each feeding. If you work outside your home, perhaps you’ve also wondered if there is a way to bake sourdough bread during the work week. Those two dilemmas–the inevitable accumulation of discard starter and the quest to find a way to bake sourdough during the week–inspired me to experiment a bit. Ultimately, I discovered that if I dramatically reduced the inoculation percentage (i.e., the amount of starter), and dramatically extended the bulk fermentation time, I could make delicious bread using only discard starter for leavening. And, because fermentation is slower with this method, I could allow the dough to rise while I was at work, and thus make bread during the week.
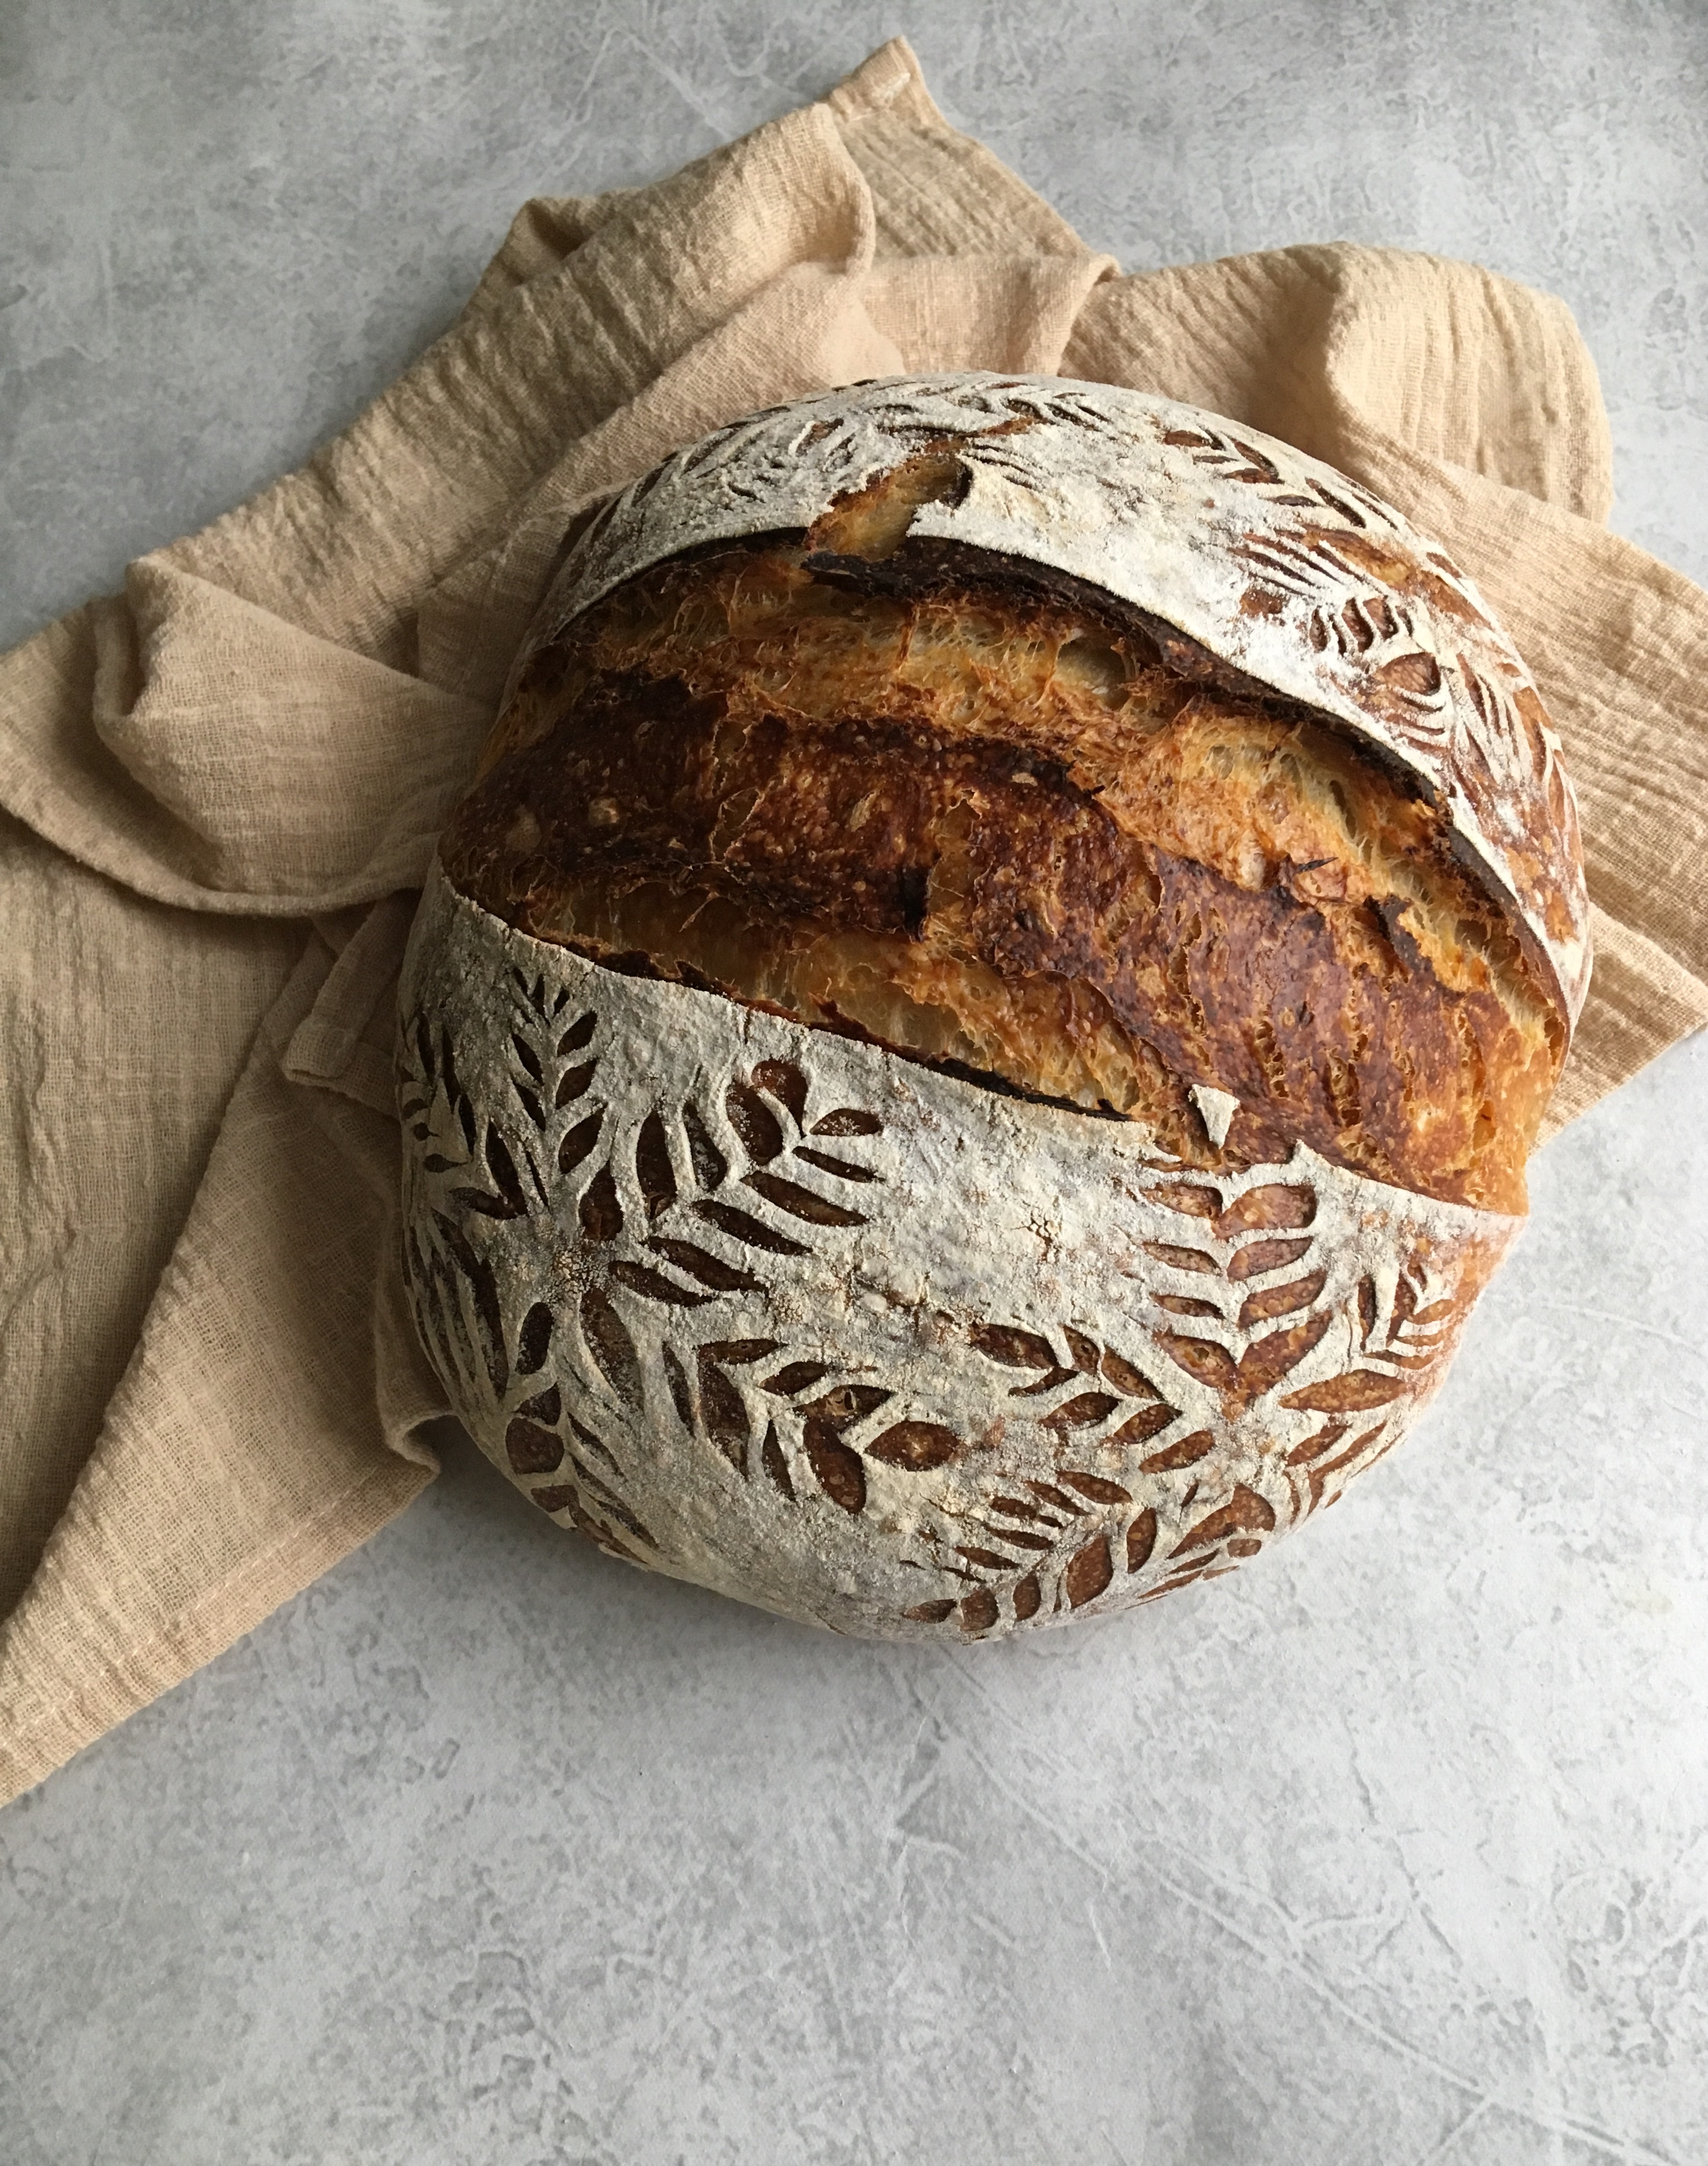
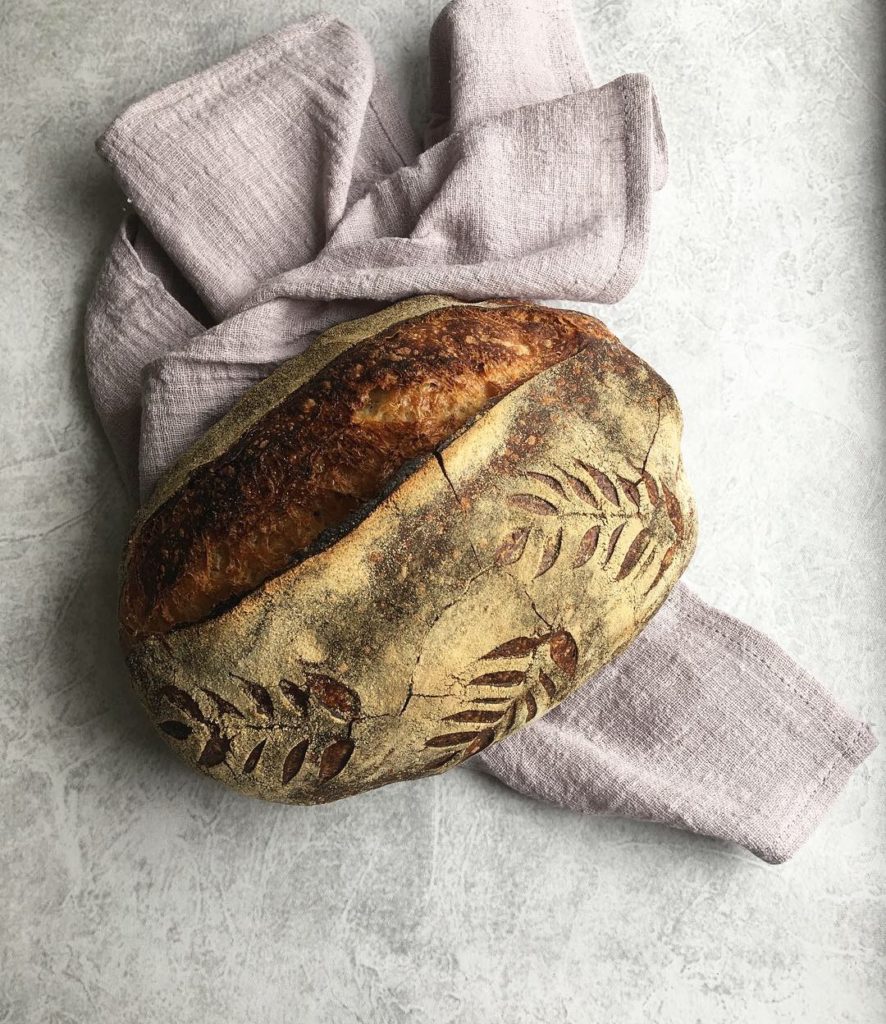
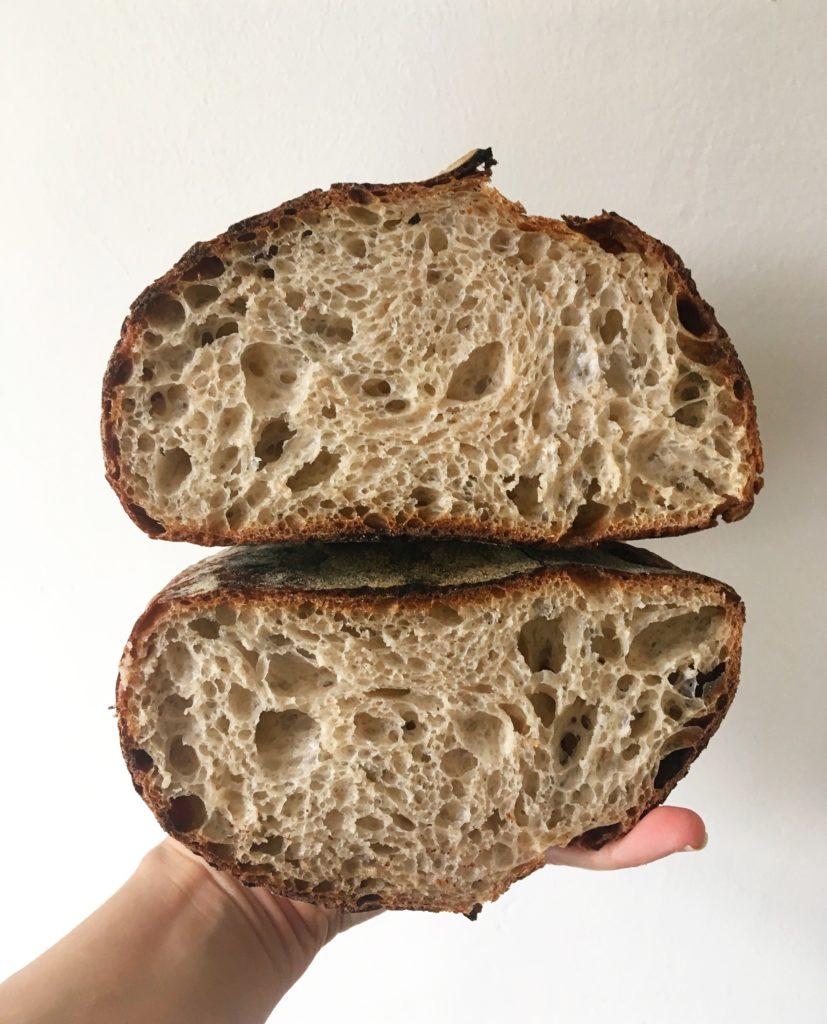
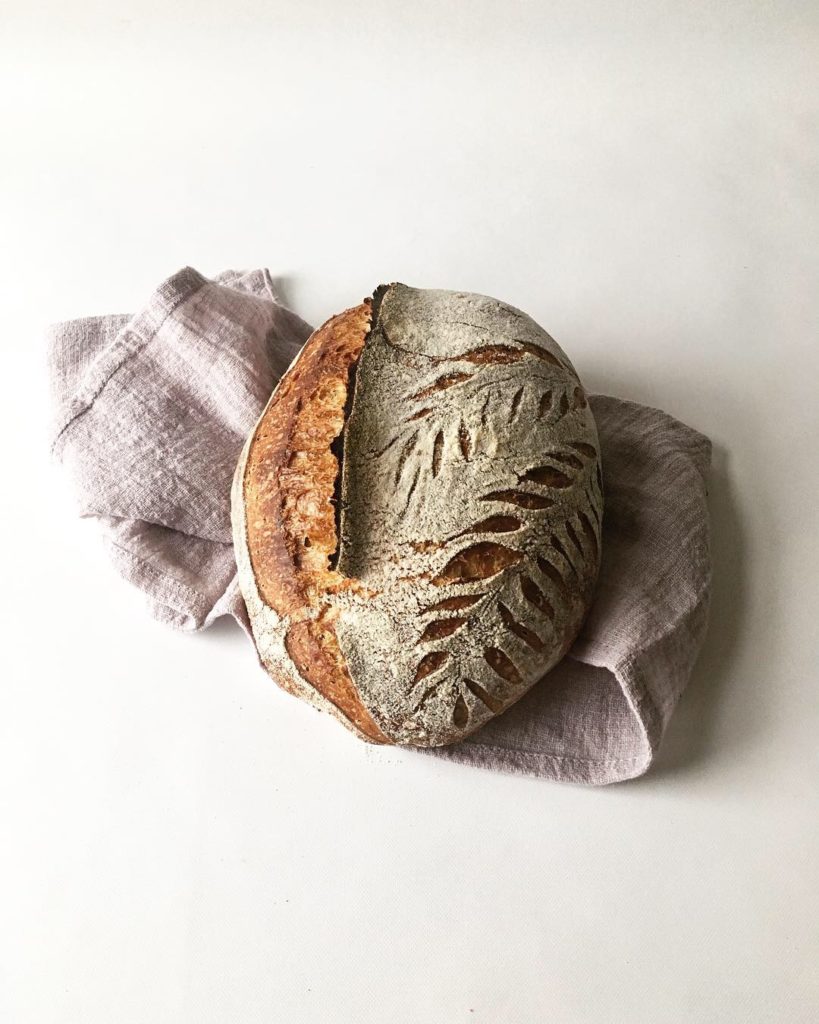
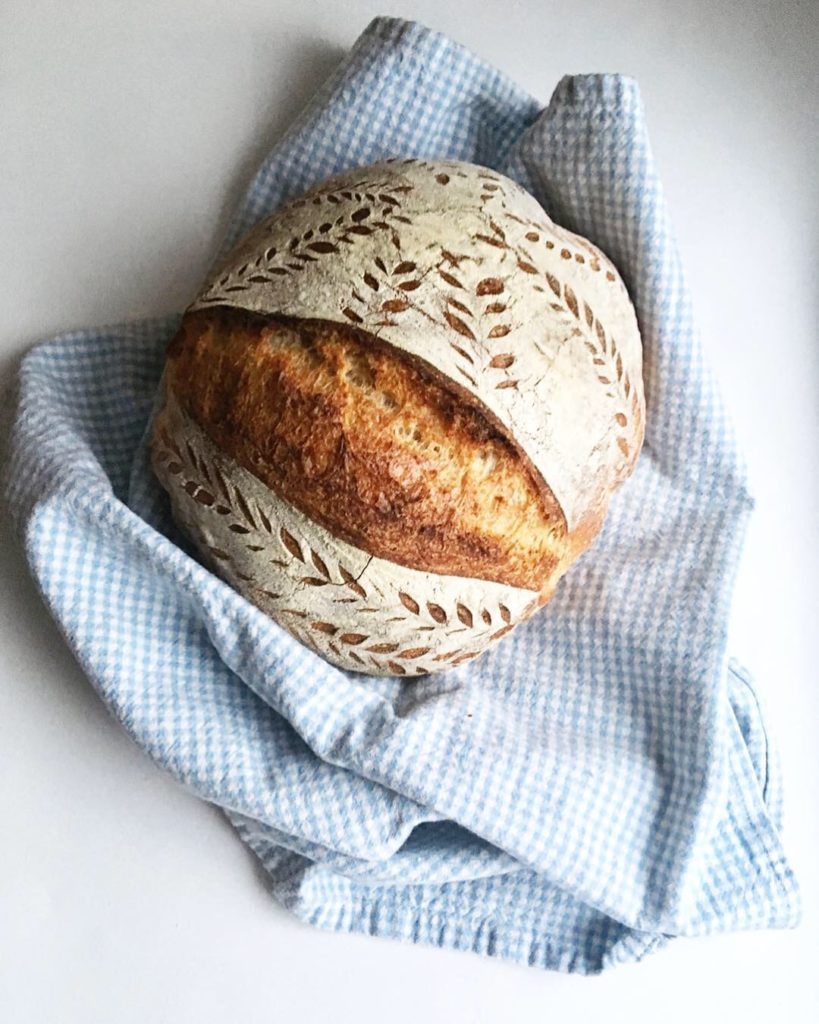
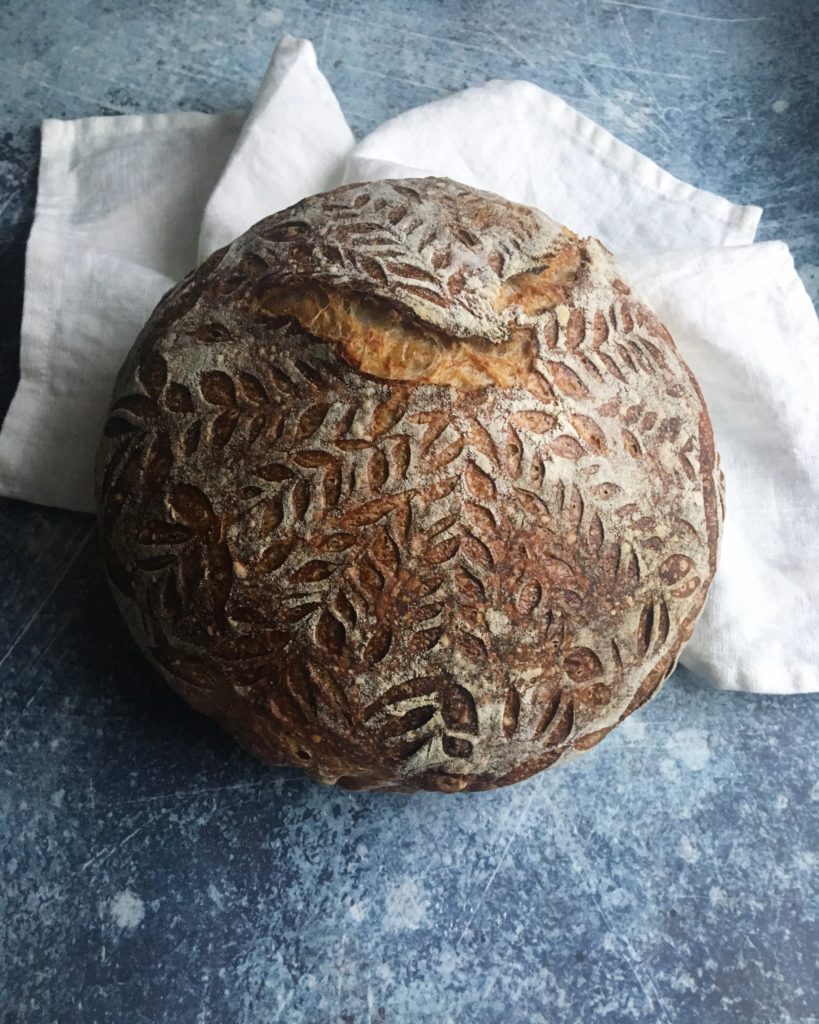
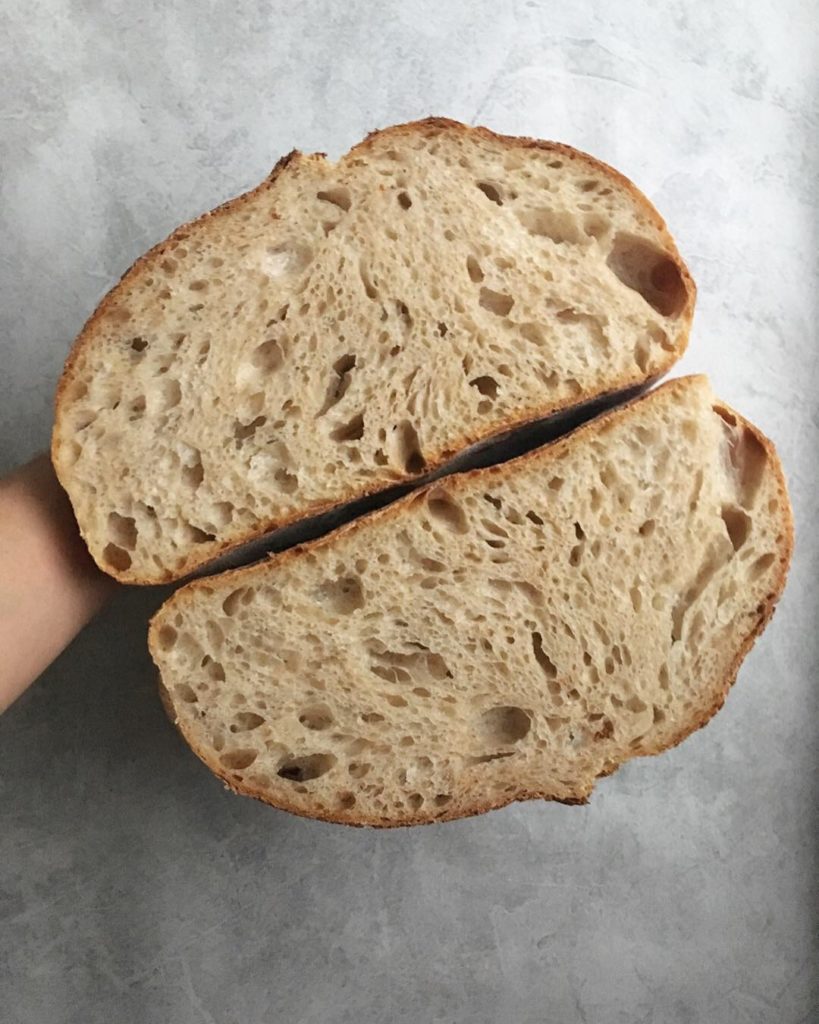
My results have been really great. Here are some of my sourdough discard loaves:
The method below can basically be reduced to three changes to the Tartine recipe: (1) replace the leaven with a much smaller percentage of discard starter, (2) use fridge-cold water in the dough, and (3) after 2-3 stretch-and-folds, allow the dough to finish its bulk rise undisturbed for 10 hours or more.
Reducing the Inoculation Percentage
There are a couple of reasons for reducing the inoculation percentage: First, discard sourdough starter is seriously sour. To keep the bread from being overly sour, you need to use a smaller amount of discard than you would of levain–I never go above 10% inoculation when I’m making a discard loaf. Second, a smaller inoculation percentage means that it will take longer for the dough to rise. Often, people have the opposite goal–they want the dough to rise faster. Here, though, the slower rise is your friend, because it means that you can leave the dough at home, undisturbed all day while you are at work.
Using Cold Water to Mix the Dough
The reason for this change is simple — it’s just another way to slow down the bulk fermentation. I use bottled spring water straight from the fridge. (I use bottled water because the tap water where I live is heavily chlorinated. You may be able to use tap water where you live.)
Extending the Bulk Fermentation
This change naturally follows from the previous two adjustments. I want to slow the dough’s rise because I can’t come home in the middle of the day to shape my loaves if the bulk fermentation is done in 4-6 hours. For me, 10-12 hours (from the time I transfer the dough to a clear container for the bulk rise) is what I’m going for.
Final Thoughts
Admittedly, I have not yet reduced my method to a science. Sometimes the dough rises less than I expect, sometimes more. I suspect this results from changes in room temperature, and/or from my discard starter having been “refreshed” more or less recently. I’ve also found that the greater the quantity of dough I am making, the longer the bulk fermentation takes. This is likely because it takes the larger amount of dough longer to warm to room temperature.
That all said, I’ve also discovered that there’s a lot of flexibility in how long I can push the bulk fermentation. For example, while Tartine Bread indicates that you should look for a 30% increase in volume, I’ve made some perfectly nice loaves with dough that had more than doubled in volume by the time I got home from work. Generally, I’ve found that I have good results with a volume increase anywhere from 60% to 90%. I suspect that I’m able to get away with such a large increase in volume during the long bulk rise because the discard starter is not super active.
These thoughts are meant to be a rough guide, and to inspire you to experiment on your own. If you have additional insights about baking with discard starter, or extending the bulk rise, please do share them! One of the many things I love about sourdough baking is that it is a constant learning process, and I enjoy every new discovery.
Country Loaf with Discard Sourdough Starter
A classic country loaf made with discard sourdough starter. Adapted from Tartine Bread.
Ingredients
- 450 g all-purpose and/or bread flour preferably King Arthur
- 50 g whole wheat flour or another whole grain flour (see notes)
- 50 g discard sourdough starter or less (see notes)
- 375 g cold spring water, divided or more (see notes)
- 10 g table salt or fine sea salt
Instructions
-
Pour 350 g cold spring water into a large wide mixing bowl, and add the discard starter, mixing to disperse the starter a bit.
-
Use your hands and/or a bowl scraper to mix in the all-purpose flour (or bread flour) and whole wheat flour until no dry bits of flour remain.
-
Allow the flour/water/starter mixture to rest for 25-30 minutes.
-
Add the salt and the remaining 25 g cold spring water to the bowl, working it in with your hands.
-
Transfer the dough to a large, clear, well-insulated container and cover the container with plastic wrap. Allow the dough to rest for 30 minutes.
-
After the 30-minute rest, complete three sets of stretch-and-folds, separated by 30 minutes. (In other words: if you do the first stretch-and-fold at minute zero, you’ll do the second at thirty minutes, and the third at the end of the hour.)
-
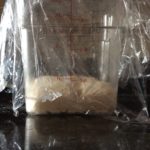
Leave the dough in the covered container at warm room temperature (approx. 75 F) for 10-12 hours. You’re looking for a 60% to 90% increase in volume. If you get home from work and the dough has not increased in volume, place the container in a turned-off oven with the pilot light on to speed the end of the bulk rise. For those who need a visual, here is my dough right after I transferred it to the bulk rise container–you’ll see that it doesn’t quite reach the 1 L mark; I generally wait until the dough has risen to about halfway between 1 L and 2 L before shaping.
-
Turn the dough out, pre-shape it, and allow it to rest for 15-30 minutes.
-
Shape the loaf as desired, and transfer it to a cloth-lined banneton that has been dusted with a mixture of white rice flour and all-purpose or bread flour.
-
Cover the banneton (I use a plastic shower cap), and leave it in the refrigerator overnight.
-
To bake the bread in a pre-heated dutch oven: In the morning, place your cast iron dutch oven (with lid) in the oven, and pre-heat the oven to 500 F.
When the oven has reached temperature, remove the banneton from the refrigerator, dust the top of the dough with white rice flour, and turn the loaf out onto a piece of baking parchment. Dust the loaf with flour (or not), and score as desired.
Using the parchment, carefully transfer the loaf to the pre-heated pot Replace the lid, and immediately place the pot in the oven.
Bake the loaf covered at 500 F for 20 minutes, then remove the lid, reduce the oven temperature to 450 F, and continue baking for another 25-35 minutes–until the crust is sufficiently dark for your taste.
-
To bake the bread with a cold start: In the morning, remove the banneton from the fridge, turn out the loaf onto a piece of parchment and score it as above. Place the scored loaf with parchment in an unheated dutch oven. Replace the lid, and transfer the pot to a cold oven.
Heat the oven to 500 F. Once the oven temperature has reached 500 F, bake the loaf in the covered pot for 20 minutes more. After the loaf has baked in the covered vessel for 20 minutes at 500 F, remove the lid, reduce the oven temperature to 450 F, and bake for 25-35 minutes uncovered.
-
Allow the loaf to fully cool on a wire rack before slicing.
Recipe Notes
- This recipe makes enough dough for one large (approximately 1.75 lb) loaf. To make a smaller loaf, just halve the quantities. To make two loaves, double the quantities. Keep in mind that, with this method, the amount of dough may affect the speed of the bulk rise, since a larger amount of dough will take longer to warm to room temperature.
- If your room temperature is moderately warm (74-75 F), the quantity of dough in this recipe, made with cold water, should rise sufficiently in 10-12 hours after you transfer the dough to the bulk rise container. However, if your kitchen is on the cool side (as mine has been lately), you’ll need to (1) allow for additional time, (2) mix the dough with warmer water, or (3) raise the temperature of the dough, and speed the fermentation, by heating the room or placing the container in a turned-off oven with the pilot light on.
- The one thing you should NOT do is increase the amount of discard starter–I’ve found that inoculation with more than 10% discard starter results in overly sour flavor.
- On the flip side, if your kitchen is quite warm, and/or you are working with a very small quantity of dough and your room is moderately warm, you can further reduce the inoculation percentage. I’ve gone as low as 5%.
- Tartine Bread specifies all-purpose flour, but I’ve used bread flour or a mixture of all-purpose and bread flour with fine results, always King Arthur.
- While I think including some whole grain flour is what gives this loaf great flavor, it doesn’t have to be whole wheat. I’ve used rye, spelt, and a mixture of whole wheat and spelt, all with great results.
- The recipe above specifies 375 g of water, total, or 75% hydration. However, you should feel free to experiment with increasing the hydration percentage. I’ve gone as high as 80%. Go with your instincts.
- I’ve included instructions both for baking in a preheated dutch oven (or combo cooker or similar vessel), or baking in a dutch oven with a “cold start.” I’ve used both methods, and while there may be a *tiny* bit more oven spring when I bake my loaves in a preheated pot, the difference really is barely discernible.
Thank you so much for sharing this recipe and all of your experimentation notes! I am very new to sourdough bread making and one of the first concerns I’ve had is all of the discarding of starter. In fact I’m experimenting with a zero waste, no discard starter method. However making actual sourdough bread with discard starter sounds like a really great option as well. I look forward to trying this out!
I’m glad you found the post helpful, or at least, of interest! 🙂 Good luck with the sourdough baking — it’s been such a wonderful adventure for me, and it’s such a delight when I hear about other people’s experiences.
Hi, I made this today and I thought it was a great recipe. I’m very pleased with the loaf and will definitely make it again. Instructions were easy to follow. Thanks for your post.
I’m so pleased that the recipe worked for you! Happy baking!!
Can you use ALL AP or Bread flour, no wheat?
You can – it will be slightly less complex in flavor.
This recipe looks amazing! Just wondering at what stage should the discard be when mixing it with the water. Should it be straight up unfed/old starter? Thanks so much for your post!
Hi! So, I’ve done this method both with starter that has not been “refreshed” in days, and starter to which I recently added excess 12-hour old levain. The longer it has been since you’ve “fed” the discard starter, the more sour it will be, so you may want to use an inoculation percentage of even less than 10%. The older, less recently refreshed discard starter will probably also be less active, i.e., the dough will take longer to rise. Hope that helps.
My dough has been resting for 19hrs and it has not risen. It is maybe a half size more than when it started. Can it be used?
If it has increased by 50%, it’s probably okay – but I’m really surprised it has been 19 hours. Was it resting at room temperature? (70-75 degrees F?) Did you check it at 9, 10, 12 hours? I think it is theoretically possible that it over-proofed – that is, rose so much it deflated on itself. But, if your starter has not been fed in a very long time, you were using less than 10% inoculation, and/or your room is very cold, I suppose 19 hours is possible. I see you posted this last night. What did you end up doing?
I ended up throwing it out. I’ m feeding my yeast now and will consistently for the next 3 days before I try again. I kind of wonder if it got too warm. My mom got involved and insisted on warming the oven quickly and turning it off. I checked it later and the “batter” was super hot to the touch. I think my yeast is ok. It smells like beer and is very bitter to the taste.
Would you recommend spraying water into the Dutch oven for the “oven spring” like a lot of other recipes? Or do you not recommend for this loaf? Thanks ( in the process of making this as I type! )
Spraying water is only really necessary if you’re NOT using a covered vessel like a Dutch oven. When the loaf bakes inside the covered pot, it creates its own steam.Then you remove the lid after 20 minutes to allow the crust to get crisp and brown.
This is a really a great post! I hate throwing things out but also don’t want to make piles of unwanted pancakes, crackers etc. So discovering that discard can be used to make sourdough bread is great! My questions is, temperatures here in my home reaches 29-30*C {hot&humid}. Do I still have to leave it out for so many hours during bulk fermentation ? Really appreciate if you could reply? And thanks again !!
If the temp where you are is hot and humid, that just means your dough will ferment/rise faster! That may be what you want! You’ll have to experiment, but you’re right that it will probably take much less time to bulk ferment.
This looks great! If I opt to proof it in the banneton at room temp, rather than overnight in the refrigerator, how long would you recommend (assuming room temp is around 75 F)?
I’ve never done a full proof at room temperature, but I would guess probably 2-3 hours. However, you’ll probably need to experiment. A lot depends on how active the starter is, how consistent the room temperature is, etc.
Great information on using the discard. Thanks for sharing your information.
?
You’re welcome!
Very good. Thank you. I had hopes. I
‘m very new to bread baking and found your recipe. My dough after a night’s rest hadn’t risen and was way too loose for pre shaping. Is there any solution?
How many stretch and folds did you do during the bulk rise? You likely needed to help the gluten develop more during the bulk rise. As for why it didn’t rise after a night’s rest – it could be that your starter isn’t very active, or that the room was chilly. When I’m using a sluggish starter, it can take up to 14 hours for my dough to rise in a 65 F kitchen.
Thanks so much for your response. Yes my discard was young and probably not very active. As for stretching And folding I did as recommended. And the kitchen is warm. I really have to discard the whole thing now I guess. And try again.
I don’t think you have to discard your starter – it just needs to be fed regularly for a few more days.
Hi I thought you had to add instant yeast to a sourdough discard bread recipe? This one doesn’t call for instant yeast so how does the bread rise? Especially since it’s unfed discard starter.
That’s the beauty of this recipe – unfed starter is just starter that is a bit more sluggish – it will still rise, it just needs more time.
I am new to sourdough and I just made this…. awesome!!
I would like it more sour though, how much starter could i use to get this to happen. Is there a trick? My starter is really sour and this is what my husband is looking for….. but the bread just doesn’t have the bite he is looking for.
Thank you 🙂
Hi Karna! If you use a greater percentage of discard starter (like 15% instead of 10%), the bread will be more sour. It will also probably rise faster. If you’re using more recently fed starter, a starter fed about 12 hours before making the bread will make it more sour than a 6-hour-old starter.
Just curiosity, if we change percentage of starter, do we have to ajdust other quantities?
Not that much, since you are going to add only 25g of starter. And to keep the dough at the same hydration rate, you only remove 3ml of water, and your dough is bigger with of 22g. to calculate TH% of the dough I’m using the spreadsheet : https://nicrunicuit.com/aide/conseils/calculatrice-pour-les-quantites-de-levain-farine-et-eau-pour-faire-tous-les-pains-au-levain/
I would like to make English Muffins. Do you think I could use this recipe? If so, what changes do you recommend? This is the first recipe that gave me enough info to make the bread the consistency that I was looking for. Thank you!
English muffins are very different. They’re an enriched dough (containing some milk and/or butter), and are cooked on the stove top usually. I tried the King Arthur Flour English muffin recipe this weekend, which uses both sourdough discard and commercial yeast, and the result was tasty. I recommend searching the internet specifically for English muffin recipes!
I have four loaves shaped and proofing with this recipe. I tripled it and quadrupled the starter, I just had so much. I’m excited to try Discarded Sourdough Crumpets! Easier than English Muffins and very similar I hear. KA has the recipe.
wow! I’ve never made four loaves at once. I hope they’re delicious.
I really wanted to comment on the crumpets as a way of using up discard. I haven’t been able to make THIS bread recipe BECAUSE I keep using up all my discard for crumpets. I am using the King Arthur recipe and they’re amazing. I couldn’t wait to get some English muffin forms so I just dump half the recipe at a time in my 10-in cast iron skillet and make a giant crumpet. My whole family fights over them. Send me your discard! LOL
I am using a modified 100% whole wheat version of the recipe, but following your recommendations for the longer fermentation process that fits into my schedule better. I appreciated your explanations of the process in the science. I am halfway through following your method and I can tell the loaf is going to be worth a five-star rating! 🙂
Thanks!
hope the loaf turned out well!
Hi there, was hoping you could give more description and maybe some tips for successful crumpets. I have followed that same recipe (though I am using an einkhorn all purpose flour) and mine never seem to come out right. They are edible but have a weird sourness or sometimes cheesiness/bitterness even though my starter smells very pleasantly yeasty. I also do not know what a proper crumpet texture is but think it isn’t cooking quite right all the way through before becoming over done on the outside. Any thoughts on this?
I’ve never made crumpets, so I can’t offer advice on those!
Worked perfectly. Impressed by detail of your instructions. Decided to make only one loaf–very small. Nest time will do full recipe to see if your “large” is same as mine! Used mostly bread flour plus 20g whole wheat & 5 g spelt, sea salt. Thanks!
So glad it worked for you! The method has really been a revelation for me.
There are hundreds of tried-and-true recipes for sourdough focaccia out there, but the one by King Arthur Flour has truly stood the test of time.
This recipe was so good! My family felt it was our best bread yet!
We will be making this often. ?
Awesome! Glad it worked for you.
We are baking our second loaf of this bread as I type!
I have a question about the Banneton.
Mine came with a removable linen liner.
Would you recommend washing the liner after each use or just leaving a layer of flour in it for repeated usages?
Hi Julie! So, I tend to wash the liner every 4-5 loaves or so. I find that the loaves actually tend to stick less when the liner is a little bit, um, “crusted” with flour. What I do is let the liner (still in the banneton) dry out a bit while the bread is baking, and then pop the liner in a ziploc freezer bag and keep it in the freezer until I make my next loaf.
So I am NOT a seasoned sourdough girl, nor am a baker…. my husband says I bake hockey pucks ?
But!!!!!!
I attempted this, screwed it up in multiple places, and had to go look up Benetton basket …. I used the strainer piece out of a Tupperware cooker… I wish I could leave a pic here because it actually looks like bread! Maybe next time I’ll cut pretty designs… this time it got 3 straight lines ….
Looking forward to browsing the rest of your recipes!
Thanks for sharing!
Amazing! I hope it tasted good (which is the most important thing, right?).
Thank you for this recipe, it looks amazing. I’ve not yet tried it as I’m a newbie and you said not 🤣🤣🤣. I am however intrigued about the rye bread you made with this. Was it 100% and you just left it to ferment longer. Thank you in advance.
I mean, if you want to give it a shot, go for it! But some of sourdough baking is trial and error/getting a feel for the dough. I’ve never done a 100% rye loaf – but I have gone up to 10-15%.
My dough seems to be very sticky and doesn’t hold shape. Should I try add more flour ? It has been about 12 hours since I started, and room temperature is probably around 65F.
This dough can withstand a very high hydration. If you started with 75% hydration, using 90% unbleached AP flour and 10% whole wheat, you should be able to develop the gluten sufficiently to avoid stickiness. A couple possible issues: Your room temperature is quite cool. At that temperature, it might take up to 16 hours for the bulk fermentation, depending on how recently you refreshed the discard/how active it is. The other issue is likely that the gluten needed to be more developed through additional working of the dough – i.e., stretch-and-folds. While 2-3 stretch-and-folds is usually sufficient for the recipe above, if you use a higher hydration, or a large amount of lower gluten flour (like rye or spelt), you may need to repeat the stretch-and-folds a couple more times. A final possibility is that you’re overworkin the dough – as you do each stretch-and-fold, you should feel the dough getting stronger. One turn every thirty minutes (2-3 times), should be enough – it’s not like kneading the dough for 5 minutes each time or something like that.
I am attempting my first Sourdough Starter and I am on Day 6. I did nothing to my starter on Day 5, when it was technically ready for use. Can I still use this? I tasted it and it tastes just like bread *mind…. blown* lol. I have always wanted to make bread but I am not an experienced baker; seems to be the time to start given the current state of our lives.
I think I need to discard and feed my starter but would also like to use the discarded portion. As I am NOT experienced, Do I weigh my starter in order to know how much I discard (i.e. half) or eyeball it?
When I feed my starter to maintain it, do I use the normal 4oz flour & 4oz water?
I am sure I have many more questions but I’ll ask these for now 🙂
Thank you for your time and your recipes!
Hi Kelly – Yes, when feeding your starter to maintain it, you should generally use the same ratio you use to build the starter. (For me, that was 1:2:2 — for example, 20 grams starter, 40 grams flour, 40 grams water.) There are a few recipes on my blog that use discard starter! Including the country loaf recipe, and a recipe for sourdough discard crackers. The King Arthur Flour website has some more good ideas for using discard, as does the blog The Perfect Loaf. As for when you starter is ready for use–It generally takes about 2 weeks (from setting the flour and water out for the first time) for a new starter to be strong enough to raise dough.
Thank you so much for your reply!
My starter is now on Day 8 (4/1/20) and hasn’t been fed since Day 4 and not been refrigerated at all. Can I feed it today and continue with it or do I need to start over?
Do I have to discard it if I’m not ready to use the discard?
Again, thank you for your responses!
I would probably start over – the starter really needs to be fed daily (or even twice or three times a day) if it’s not refrigerated. The problem is that, if its not fed the starter basically starts to feed on itself, and then the pH gets messed up etc. So I would advise starting over. The King Arthur Flour website has really good instructions for creating and maintaining a starter.
I am working with ATK’s tiny starter. Should I be storing my unrefreshed discard in a jar in the fridge or at room temp until I have enough?
Fridge! It will go bad (basically eat itself) if you leave it on the counter without regular feeding.
Great recipe and technique, thank you! After shaping, I put my dough into an 8×4″ loaf pan and covered with plastic before an overnight rest in the fridge. Baked it about 12 hours later following your baking instructions above, covering the pan with a 9×13 pan for the first 1/2. Final product is tasty and nicely shaped for sandwiches. Next time I will try to add a little steam in the oven with a pan in the bottom and hot water. Thank you!
So glad it worked! Interesting idea for sandwich bread!
How did you get the beautiful vine design on the bread? Thank you for the recipe!
It is scored using a bread lame (basically, a razor). Before the bread goes in the oven, it’s dusted with flour and then is cut with the lame. The designs open in the oven.
I discovered your recipe this evening and am now waiting for the 30 minute stretch and folds. However, I realized that after it has been resting all night, it then has to go in the refrigerator! How long would I need to refirgerate before baking (since I’m doing the resting overnight as opposed to all day “while I’m at work?”)
Thank you!
So, my loaf does not rise that much when it’s in the fridge. Really, after you shape it, if you have time to leave it out for an hour, 7-8 hours in the fridge should be fine. You can also do the final proof at room temperature for 3-4 hours – but the loaf will be much more difficult to score and transfer to the oven (it firms up a bit in the fridge.)
I used this recipe and prepared quite a wonderful loaf of bread. However, the crumb is a just a little bit wet and sticky… why do you think that is?
A few possibilities: (1) Did you wait at least 3-4 hours before slicing? Sourdough loaves like this need to be completely cool before you cut them, or else the texture will get gummy. (2) It’s possible it was underproofed. If the dough felt strong when you were shaping it, then it’s most likely that you cut into it too soon. I guess another small possibility is that it was underbaked, but if you baked it covered at 500 for 20 minutes, and uncovered at 450 for 25, it should have been well-baked.
For this loaf, I decided to try and tweak the whole wheat to white bread flour percentages. I still wanted some of the WW taste and texture, but a bit more white in this loaf. Due to the WW reduction ( from the last Tartine recipe ), I ve also reduced the amount of water to 79%.
My husband and I prefer bread shaped in a loaf pan. We like to eat grilled cheese sandwiches and toast and jam for breakfast.
Can you tell me if this recipe would work in shaping as a loaf and how do I go about doing this?
I’ve never tried baking the country loaf in a loaf pan, but if you give it a go, I would suggest lining the pan with parchment paper, then, after you shape the dough into an oblong/batard shape, place it in the loaf pan for the final proof, rather than letting it rise in the banneton. So you’ll proof the dough in the pan you’ll ultimately bake it in. Let me know how it goes!
The recipe was easy to follow, thank you! Mine didn’t turn out into the pretty dome shape, even though it had risen about 60% overnight. I found the dough impossible to shape into a tall ball, it just kept expanding out on the board. I did do extra stretch and folds but it kept flattening out and the final baked was also flat. Would you have any suggestions for that?
Tasted great, though a little compact like cake almost, but there were a few holes throughout ?
Hi Julie! I’m glad it tasted good. There’s a possibility that you *overworked* the dough in shaping, knocking out too much air. Next time, you could try adding an additional stretch-and-fold early in the bulk rise (you want to do as much gluten development as you can early in the bulk, so that you can avoid deflating the air bubbles). You could also try doing a longer bench rest after you turn the dough out after the bulk rise. For example: Turn out the dough onto the counter, do a light “pre-shape,” and then let it rest, covered with a tea towel, for an hour, before doing the final shaping. You could also try pushing the bulk rise a tiny bit longer — say to 70% increase in volume. Finally, maybe search YouTube for some shaping videos? Creating the taut shape is not necessarily intuitive (as I’ve learned as I’ve tried to explain it to my mom via FaceTime!). Good luck!
can i use very young inactive discard with this recipe since it calls for yeast? i have an excess of barely there discard from starter missteps but have already wasted so much flour.
I’m not sure which recipe you mean – my country loaf recipe calls for no commercial yeast, just discard. For this recipe, you’ll want to use discard from a starter that is already mature. (So if you just created your starter 3-4 days ago, or even a week ago, your discard won’t be active enough.) However, there are lots of recipes on the internet that would probably work for you — any recipe that involves added yeast or baking powder for instance. King Arthur Flour website has many such recipes.
Turned out super well! Great use for sourdough discard and a great progression from a simple sourdough recipe!!
Awesome! Glad to hear it worked.
My starter has been going for over a month now. I recently started saving all the discard in a jar in the fridge. Could I use the refrigerated discard for this?
Yep! Straight from the fridge. The more recently it’s been “refreshed” with new discard from a feeding, the more active it will be.
Thank you so much for posting such an awesome recipe! I’ve tried it a few times now and works great every time. I’ve been using 60g of starter though and love the extra tantines i get. It only takes about 6-7 hours to get the bulk rise i need. But then i can’t leave it for more than 10 hours to proof in the fridge.. My question is – given current SIP I’ don’t really care /need the Longer bulk rise. But I love the idea of using discard instead of tediously creating a levain for the original recipe. If I use the discard and don’t want the longer bulk rise – what’s the best way to tweak this recipe to get me to the proofing phase faster? Or is it better this way even if you don’t “need” to slow the bulk rise? I’m still a beginner so learning but have produced some wonderful loaves already using both this method and the traditional tartine way. Thanks!
Hi Emily! I’m so glad you enjoyed the recipe. If you want to shorten the bulk rise further, you can use warmer water to mix the dough (I would say up to 85 F). If you have control over your room temperature, raising that by a couple of degrees will have the same effect. You could also experiment with using a higher percentage of whole grain. Einkorn and whole wheat flour ferment faster than all-purpose, so if you used, say, 20% whole wheat instead of 10%, that would probably also make the bulk rise go faster.
I too love the idea of eliminating the need to make levain prior to making my sourdough bread. I use only freshly milled einkorn wheat berries for my baking and would like to attempt this recipe. I created my whole grain einkorn starter according to Carla’s method at Jovial, it is mature and strong and of course a lower hydration as she recommends. Do you think it would work in this recipe by just adjusting the flour amount? Also, I have been adding potato flour for a softer crumb and better rise, do you think I could add it here too? I also only bake in loaf pans, everyone in my house prefers it that way.
Hi Becky – sorry for the delayed response. I think for the starter, I think it depends how much lower hydration we’re talking about. (It looks like Jovial recommends 1:2 vs. 1:1). I don’t see why it wouldn’t work to try it, with an adjustment to the flour amount! The rise time might be affected a bit. Adding some potato flour should not be a problem, as long as it is no more than 10-20% of the total flour volume. I’ll be interested to know how it turns out!
I tried this but Its A little flat. Wonder how to improve the oven spring. ? Will you have any advice? I live in a tropical climate so instead of bulk fermentation in room temperature, i had left it in the fridge over night and bake it at 12pm. (I had left it in fridge at 11pm last night 11pm)
If you tried to do the bulk fermentation in the fridge, that’s your problem. For this recipe, you’ll generally need 10-12 hours for the bulk fermentation if the dough is at normal room temperature — say 70-75 degrees F. The temperature in the refrigerator is usually less than 40 degrees (!) F. So, that’s simply much too cold for the wild yeast to do much. If you’re in a tropical climate, you’ll probably be able to do a faster bulk rise at room temperature, or, if you want to slow it down, you can use a lower percentage of discard starter (say, 4% instead of 10%).
Hi, in step #7, can i leave out for longer than 10-12 hours?
Sure – it all depends on how active your starter is, how warm the room is etc. If the dough has not increased in volume by at least 50% after 12 hours you SHOULD leave it out longer. I’ve had success with dough that has increased as much as 90% in volume during the bulk rise. If it rises more than that–say more than doubles in volume–you’ll risk the dough being overproofed. It’s all about understanding the dough and adjusting to your particular environment.
Hello. I was wondering if for the second part of baking , a tray with water in the oven would help the bread to grow more and become “fluffy”. Many thanks. Dont laugh, I have zero knowledge in serious bread. 🙂
For the “second part” – you mean after the cover is removed from the dutch oven? If so, no, you don’t want to add steam during the second phase. Baking the bread in a covered vessel during the first 20 minutes allows the bread to create its own mini steam oven. During the second phase, without steam, you want the crust to brown and crisp. Also, virtually all (of not totally all) of the rise happens during the first 20 minutes.
If I want to make two smaller loaves with this recipe, do I use the same bake time for each loaf (will be baking each separately) or do I decrease the bake time? Thanks!
I generally use the same bake time – though after you take the top off the dutch oven, you might check at 20 minutes vs. 25 minutes if you’re feeling cautious!
Thank you so much for this adaptation of the Tartine country loaf (possibly the yummiest bread EVER) with sourdough discard! I am really excited to get started, but I have one small, possibly stupid, question. When transferring the bread into the (hot start) oven does the parchment paper go with it? From how I am reading the cold start instructions, it seems to, but I can’t discern whether the parchment is just the tool for getting the loaf into the hot oven, or if it stays along for the entire bake. If so, do you have any input on the size of the parchment? Thanks so much!
Hi Caitlin! When I bake my bread in the dutch oven (with either a cold start or hot start), I transfer the loaf on the parchment into the vessel – so the parchment stays underneath the loaf as it bakes. as for size, I generally will tear off then crumple up and uncrumple (to make it more flexible) a piece of parchment slightly larger than my banneton/loaf. Then, before transferring it to the dutch oven, I’ll cut or tear off as much as I can around the edges while still leaving enough of a border for me to hoist the bread into the dutch oven.
Thank you for this post! I have been making Tartine country loaves for two months now and wondering why I can’t just use discard since I feed my starter at night. Trying this tomorrow!
You’re welcome! I hope your loaf turns out well!!!
Here’s a mystery though…I feed my starter twice daily, night and morning. When I make a levain the night before following Tartine’s instructions, the levain always floats in the morning. But my regular 1:2:2 feed never floats after 12 hours (same timing as the levain). Tartine levain is 1:4:4 I guess? I have never weighed the 1 tbs of starter but looks like about 50 g. But that always floats…is that because of the higher ratio of flour & water? Makes it a more active starter? I am guessing so…I was going to try making a levain with less flour & water so there is no waste but I’m thinking it may not float. Have to experiment myself but curious if you have already done so?
That is a mystery. I guess one possibility is that your starter is so active that after 12 hours at 1:2:2 ratio, it’s already peaked, fallen, and “liquified.”
So last night I tried feeding my starter later at night, pushing it out about 3 hours. I also reduced the amount of rye in the feed and increased the a/p flour. Had a very active starter in the morning! 🙂
Great!!
HI Elizabeth,
I am proofing this dough right now for the first time. I am actually home so I can watch it. Is there an ideal dough temperature you aim for during the bulk? It’s pretty warm today and my dough is reading 77 degrees F. I am always worried about overfermenting as that’s been an issue for me in the past and I never seem to know when to end the fermentation process. The dough has been resting about 3 hours at 78 degrees in house and has grown about 20% so far.. I am watching it for the 60% rise but just curious about dough temp as I thought it would be cooler based on the cold water….would you say that the volume increase is the best indicator of when fermenting is done? And the windowpane test?
Hi Ellen! For me, the volume increase is the best indicator, however, you’ll have to get to know your dough and starter. If you turn out the dough a little early, and it goes slack when it rests after the pre-shape, you can compensate with a longer bench rest. At 78 degrees, your dough will warm to room temperature more quickly than it would at, say, 72 degrees. I actually have never tried the windowpane test with sourdough country loaf dough, though I use it constantly with enriched doughs!
Well it’s in the banetton now so I will report back in the morning! I pre-shaped after about 7.5 hours, it was about double in size from the start. I found it quite sticky for the final shape. I feel like this always happens to me and I don’t know why but I can’t just pull up the dough with my hands for the final shaping. I have to use the bench knife. Is that normal?? I know when I first started making sourdough breads I didn’t have this issue . I don’t know what has changed though perhaps I’m going with slightly higher hydration…but I see people on videos making high hydration doughs and it doesn’t look so sticky for the final shape….curious to see what comes out of the oven tomorrow!
I generally need to either wet my hands with water or dust the dough with flour to avoid it sticking when I’m doing the pre-shape and shape. But, theoretically, the better developed your gluten, the less sticky it should be.
I’m new to the world of sourdough baking and did not realize how much of a science and art it is! As I am still learning & having fun with the process, I somehow have an overabundance of discard. I’ve made plenty of pancakes and banana bread with discard and was hoping I could find a recipe for bread and here I am!
This is only the 4th sourdough loaf I’ve made & my husband said that this is the best loaf yet! Everything about it – the taste & texture was perfect! And what is amazing to me is that I made it without an active starter!
I know there is a disclaimer that this isn’t really a beginner recipe but I took my chance & very glad that I did! One thing that is intimidating is working with the very wet dough. I’m sure I followed the directions exactly but tried not to get too stressed about it. I did let the dough rest for 10 hours (temp was around 75 degrees) – it looked to double in size and I had some big surface bubbles. When I tried to do the pre-shape it kind of flattened out a bit & I was afraid I ruined it…but I did my best to make it into a ball to put in the banneton. It slept in the fridge for approx. 8 hours. Upon prepping to bake, I was still very nervous that it may become a pancake….but it poofed up nicely, good crumb, nice texture & crust (although I need to work on the bottom – it’s a bit tough to cut through) – I will be using this recipe again! Thank you! (I welcome any advice to improve my newly baking skills!)
It’s hard to know what the issue is with your dough – it could be that the gluten was not strengthened enough during the bulk rise. You could try adding another stretch-and-fold or two. You could also try a longer bench rest. There’s also a possibility that the dough overproofed, but it sounds like it baked up well, so, I’m not sure! Sourdough is a constant learning process!
Thanks for taking the time to reply – I will definitely keep experimenting – I am sure there are multiple factors that affect the outcome of the loaf so I will definitely consider the extra folds & bench time. The best thing to do, as the beginner “baker,” is to take specific notes to remember what works best. Thanks again for sharing this recipe!
Can you add mix ins to this loaf such as cheeses jalapeño? At what step would you add it? Thanks!
See my more recent recipe for a sourdough discard loaf with cornmeal, jalapeno, and cheddar! You can follow the process outlined there.
Hi,
Great recipe for using discards. As for the overnight proof in the fridge, can the proofing time be extended beyond 12 hours ?
Thanks
Sew
Yes. I usually leave it in the fridge 14-15 hours, and up to 24 is usually okay, depending how cold your fridge is.
I love your recipe and have made over 15 loaves with it so far! It’s definitely help me end up with way less discard. I especially love the extra flavor it brings to the bread. My nieces prefer extra sour sourdough, so I made them a loaf with 100g of 2-day old discard, and it turned out perfectly! Since then, I’ve been using 80-100g of discard when making bread for others, and everyone raves about how delicious the bread taste. My cousin even said that her loaf (which had 100g of discard) had the PERFECT amount of sourness. So for anyone who loves sour sourdough, I highly recommend using 80-100g of 2-day old discard in your loaf! Oh an added tip: If you want to make a double-loaf recipe (1000g of flour and 700g water), I highly recommend separating the dough into two containers during the bulk fermentation process because it allows the dough to rise better. In my experiments, keeping the dough as one giant piece took a couple of hours longer than what the recipe called for.
15 loaves! Wow. Glad you’re enjoying the recipe. I, too, have found that the bulk rise takes longer when there is a large amount of dough in the container. Good idea to split it.
Oh, I have one more thing to add. This may be due to my own oven, but I found that baking the bread at 500* in the dutch oven lead to my loaf having a thicker crust than I like. I experimented a bit and found the best crust was created when I only baked the bread at 500* for the first 5 minutes. Then I reduce it to 450 for the next 15 minutes. After that, I take the dutch oven lid off and continue to bake at 450* for another 15 minutes. With this method, my loaves came out nicely with a thinner but still very crunchy crust and really nice ears. The inside is still soft, fluffy, and perfectly cooked. I use a thermometer to check the done-ness of each loaf at the end. Again, this may be very specific to my oven. I highly encourage everyone to experiment with the setting of your oven a bit!
Definitely a good tip. I’d found that I didn’t always get as dark a crust as I wanted when I baked at 450 for the whole time, but occasionally I go with a lower temperature to get a less “well done” crust.
Um, excuse me, but this recipe is ah-mah- zing! Maurice (my sourdough starter) and I had a blast creating this masterpiece. Super easy, clear steps. Flexible bulk rise time. Soft, chewy crumb, with the signature little and big holes. May have added a little too much salt, but an easy fix for next time.
Thanks for sharing!
So happy that you and Maurice had fun! 🙂
Thanks for all your good info and for pointing back to the Tartine recipe.; I have used both as information points with success!
You’re welcome! Happy baking.
I am trying your recipe for the first time, but am using starter discard from last nights onion rings that I fed this morning with intent to do a different bread LOL!! I don’t like any sour to my breads. Would it be ok to use fresh fed starter and just reduce my bulk ferment? I also choice to do an autolyse with just the flour and water (minus 25 grams) for 2 hours before adding the rest of the water, salt and starter. Not sure yet if I’ll do in a loaf pan or in the cast iron D.O. yet.
Yup – all of those things should be fine. Sourdough baking is pretty flexible. You’ll just have to monitor your dough to figure out the correct timing, etc!
Hi! I usually bake 2 loafs/week now since last november. I am always looking for ways to use discard (other than crumpets, and muffins, etc.). So I accumulate my discard in the fridge….. it’s there since weeks… sometimes I add new leftovers. When do we know it’s no good no more? When I smell it, it seems ok. Could I use it to try your recipe? I like the sour taste of bread !! Your use of leftovers looks very innovative! Thanks!!
Yes! Definitely. As long as you’ve “refreshed” the discard in the fridge with new excess starter (“leftovers”) within the last couple of weeks, it should work. If your discard has just been sitting in the fridge for a month without being touched, it will at best be very sluggish, and very sour.
Thank you so much for your answer!!
Thank you so much for this recipe. Very easy et tasty bread!!!
Your recipe worked PERFECTLY! I am so excited I wish I could post a picture of my loaf! Thank you for sharing this easy to follow recipe. After a few frisbee loafs baked this week using a different recipe, today I baked a beautiful round oven spring loaf with an ear by following your recipe to a T. Thank you!
You’re welcome! Glad it turned out well!
So I usually use 150 g fed starter, 25 g rye flour, 150 g whole wheat and 225 g white flour. Could I still use that proportion of flours with your recipe using the discard starter. I want more whole grain bread than white bread.
Yes – the higher percentage of whole grain means it will ferment more quickly. I would not use more than 40 g of discard for leavening, for the reasons explained in my post.
Hello Elizabeth – Thanks so much for your recipe! I’ve used my discard for many things, including more bread but fortified with commercial yeast. It didn’t occur to me that discard (maybe that’s a bad name for it) is just more starter as practically all recipes call for newly -fed starter at its peak, or a levain. Reading through your recipe resulted in a duh-moment for me. I’m still working on my shaping skills and I don’t have the optimal baking set up yet, but it rise it did and the crumb is just wonderful. We can’t wait to taste it. Many thanks again and I look forward to more SD recipes on your blog.
I’m so glad that you appreciated the recipe! Figuring out that I could use discard starter as my sole leaven was a big revelation for me, so I was excited to share it!
So how long can you use the discard for your starter. I would think it eventually would have to be fed to create new discard that is viable. Just trying your method this morning
Any discard will eventually “eat itself” if it is not “refreshed” with excess starter that’s been more recently fed. So, for instance, if your discard has been sitting untouched in the fridge for more than a month, I’m doubtful that it will work here. (It will also be EXTREMELY sour, if it has not totally gone kaput.)
So ive just used discard that’s been in the fridge for quite some time, after the third stretch and fold it’s lost a lot of elasticity and I’m not sure it’s going to work. I am tempted to add in commerical yeast!
It’s hard to know what the precise issue is without seeing your ingredients and exact process. But if the starter has been in the fridge–and not “refreshed” with excess starter that’s been more recently fed–for more than a week or two, it will likely be pretty weak.
Yes so it did rise a little and did taste and feel like sourdough probably with the help of commercial yeast. I think this recipe should clarify that the starter discard should be active ?
As I explain in the introduction to the recipe, this is a technique that requires experimentation and getting to know your starter. For example, the speed at which the dough will rise may vary with how recently your discard was refreshed with more recently fed starter. It would be misleading to say the recipe requires “active” starter, because “active starter” usually refers to starter that has been recently fed with fresh flour/water and is actively bubbling.
I have made this recipe about 10 times and never used active starter, in fact I made two loaves yesterday with discard that had been in the fridge for weeks
If you follow it step by step you should be ok .
Note: I’ve never used spring water, just cold water, and mixed up the stretching step and did it after the first 10 hour rise, so I’m not exactly being precise.
The spring water/distilled water vs. tap water only matters if you live in an area with highly chlorinated water (as I do, in DC).
This makes the most amazing bread. In fact I find the ‘crum’ is far superior to a normal sour dough loaf. I add seeds (pumpkin, sunflower, flax/linseed) and quinoa to my loaf to give it that lovely nutty texture. This will be my ‘go to’ recipe in future
Sounds delicious!
This is now my one and only sourdough recipe. I’ve made it about 10 times, and it’s perfect each time (and this recipe was my first ever recipe!).
My question is that it like to make a spelt loaf…can I use the same recipe and just swap 1:1?
Thank you ?
Hmm. Spelt acts somewhat differently than wheat flour. I’ve never made a loaf with more than 20% spelt. You’ll find that the dough gets a lot more slack, even with 10-20% spelt, requiring less hydration and more stretch-and-folds to develop the gluten. Also, if your spelt is whole grain, that, too will be different. I recommend experimenting with part spelt/part AP or bread flour.
I’m trying this today and have a question, my sourdough discard was frozen (not dehydrated). I defrosted it the night before making this bread. I added the starter to the dough 5 hours ago and so far no rise at all. I have performed the stretch and folds during that time and I’m leaving it in a warm place, around 28 celcius.
Is using defrosted sourdough discard ok or do you think it may not rise? Thank you.
I’ve heard that freezing starter can kill the wild yeast, so I’ve never tried it. It’s possible that your starter simply didn’t have any active yeast left.
It ended up working perfectly, it just took a long time for bulk fermentation, 11 hours at 28 celcius, but it worked and the loaf had a great rise and ear. Thank you for the recipe I’ll be using it regularly in future!
Glad it worked!!
Hi,
Thank you for sharing your recipe! I’m relatively new to sourdough baking, so your explanations were very helpful. My bread came out pretty good. I’m making another one today. Can’t wait! Sourdough baking is pure pleasure & simply addictive, wouldn’t you agree?
I agree! I’m glad your bread came out well!
So happy to find this recipe! Always looking for ways to use discard AND I have been on the hunt to make the sourest sourdough! I love love love sour bread. If I increase the amount of starter, how much should I decrease the bulk fermentation time?
You’ll have to experiment – it really depends on how active your starter is, what the room temperature is….so many things!
Made this loaf and it came out amazing. Super easy to follow and very forgiving. I had to let is rise on the counter way longer than you recommended and it still turned out great! Perfect texture and flavour. This is going to be my go to recipe for sure. Thank you!
Yes – rise time will depend on a lot of factors! So glad you enjoyed the bread.
Thanks so much for this recipe! I’ve used it several times with great results. I’m trying to understand sourdough a little better and was wondering if you could help me out. You said your recipe is adapted from the Tartine country loaf, which only calls for a 20% increase in volume during the bulk rise — compared to 60%-90% in your method. Why the difference? Does it have something to do with using discard versus starter?
I generally have found that I need a greater increase in volume than prescribed by Tartine, even when I’m using a young levain.
Love this! We’ve used this recipe a handful of times now when I’ve forgotten to feed our starter in time for our weekly loaf, and it doesn’t disappoint!
Glad you’ve enjoyed the recipe!
What’s the maximum age of discard that you would recommend for this recipe?
I think if it has been sitting in your fridge for about 2 weeks, without having been “refreshed” with discard from a recent feeding, the starter will probably be quite sluggish, and will also be very sour. But it will probably still work if you have time for a very long bulk fermentation. I think three to four weeks is probably the outer limit for unrefreshed discard.
Followed the recipe but my bread came out gummy and had big holes. I followed the time frame given but my variable could be the temperature? My benchtop temperature was abt 17C? Should I have left it longer on the benchtop? I know that the loaf was not over proven because when i did the poke test, the dough was ok and there was oven spring. Its only the crumb that was gummy and not “dry”. Any thought on how to improve my sourdough?
Hi Sim – Yes, it sounds like your dough was underproofed, and the room temperature was the culprit. As specified in the notes to my recipe, the ultimate bulk fermentation time necessary will depend on a lot of factors, including room temperature. 17 C is approximately 62 F — much cooler than normal room temperature. It’s for this reason that I rely on how the dough looks and feels, rather than number of hours, to determine whether it has proofed for long enough. You want to look for an increase in volume of at least 50 percent.
Thanks Elizabeth. I will have to watch the temperature and the increase in volume in my next try
Sim, a couple other thoughts/suggestions….you can do the float test on your dough (it’s not just for starter!). I start checking for float a little before I think it will be ready towards the end of bulk, then check again every 15-30 minutes to make sure I catch it just when it’s prime and not over. There is also a marked difference in how the dough pulls away from the bowl when it’s ready. It should come off the sides of the bowl as if the bowl was greased (even though it’s not), aka very easily with almost no dough sticking. Also…how soon after it came out of oven did you slice into it? I find that if I don’t wait at least 2 hours, it tends to be gummier inside. Just my two cents…even though you didn’t ask ME :).
Thanks Ellen. Will definitely look out on float test bit and non stick based on ur advice. I only cut my bread after 6 hours after so much anticipation sighhhh. Will include your advice in my next bake ?
Hi! So my bread turned out super tasty but not very airy. Prior to putting the dough in the fridge it was very light and had doubled in size after 10hrs. It deflated in the fridge! Any suggestions on what I might have done wrong?
It’s possible that it was actually a bit overproofed – that is, at a certain point, the wild yeast will run out of “food.” If the dough had fully doubled in size, and your starter was fairly active and/or your fridge was not super cold, it’s quite possible that it overproofed. Next time, aim for a 50-60% rise before putting it in the fridge (rather than a 100% rise, i.e. double).
Thank you so much for this recipe. I have been making sourdough for months and lots with success. A few flops here and there and thus I really focused on strengthening the starter. I left it in the fridge for a week and then started to apply your method. I was learning how to manage the discard as well. I would take 5gms out from the jar in the fridge then begin strengthen that every day, put the rest in discard jar and do it again. It keeps it all manageable! The results are amazing, the strength of the starter and the flexibility in your schedule. I will be using this as my main go to recipe.
Fantastic! Glad it has worked well for you.
This has been my go-to recipe since I discovered it in May. I’ve tried a mix of bread flour/ rye and bread flour/ whole wheat and it always turns out beautifully. Thank you so much for this recipe!
You’re welcome! So glad you’ve enjoyed the recipe.
Does anyone know the approximate volume of their dough before the bulk rise? I didn’t quite notice mine before letting it rest and now it’s just under 4 cups (after ~18 hours in a colder environment). I think my starter is immature, but trying to figure out just how much it’s risen. I do see bubbles on the surface, but it failed the float test.
Hi Amanda – When I turn the dough out into the bulk rise container, it is usually not quite to the 1 L mark.
This is a great recipe, so much like artisan bread. I will use again!
Wonderful!
Hi Elizabeth I love the patterns on your crusts – are they made by your bannetons? Where do you buy them?
Regards
Shirley
The “patterns” are from scoring the risen dough with a bread lame (basically a razor). The cuts open up in the oven and form the pattern.
Followed the recipe to a tee – did 3 sets of stretch and fold, bulked for 12 hours and it rose at least 50% – turned it out and could see long gluten strands (was quite bubbly). Shaped and pre shaped – put it in the banneton and it was quite wet but was able to stitch it up. However, when I took it out of fridge to bake I noticed the stitching had pulled open as it cold proofed. When I went to score it – it was losing shape a bit. Put it in the challenger pan and it had a small ear but it spread rather than rose. I’ve cut it open and it has a nice crumb but just not a nice rise…any tips?
It’s hard to know without seeing and handling the dough, but it seems likely to be a shaping issue.
Hello Elizabeth,
I first tried this recipe almost a year ago…..beginning of ‘Life With Covid’.
I wish I would have counted how many times I’ve made this bread!
I’ve tried lots of other recipes out there but keep returning to this wonderful Country Loaf.
I’ve added chopped walnuts, cranberries, pecans, etc.
Every loaf has been delicious.
Thank you for sharing this yummy use of discard sourdough starter!
Wonderful! I’m so glad you’ve been enjoying the recipe.
Thank you so much for the recipe. The detailed explanations were extremely helpful for a beginner bread maker like myself in learning the process of making the perfect sourdough bread. I’ve made it twice, and with great success. I’ve used 25g less water for a less dense and airy dough. I was so proud of how they turned out! I read and reread your notes for guidance, and the more I read them the more sense they make. Many thanks for sharing your knowledge and experience with us!
I’m so glad the notes were helpful, and delighted that you enjoyed the bread!
yes!!!
i followed this recipe pretty closely, besides extending the proof times a bit since it’s chilly where I live. I made a boule. with very gentle handling, this recipe produced my best crumb yet: nicely open and fluffy!!! it was absolutely delish and the mouthfeel of the open crumb was AMAZING!!!
however this loaf did not have very good oven spring or height. I think because I handled the dough so carefully I didn’t create enough tension, so I guess one thing came at the cost of another.
totally recommend.
I’m glad you enjoyed the recipe! You’re right that it’s difficult to find the right balance in handling the dough! Sometimes developing more gluten strength earlier in the bulk fermentation can help, because it allows you to handle the dough less after it has increased in volume.
I make this often, and it’s great! I was thinking of using an egg wash to get some seeds to stick to the outside better. Anyone tried that? Not sure if it will burn in the hot Dutch oven, or cause the crust to be too soft…
I’m not sure about egg wash–I think you’re right that it would probably burn. Have you tried just coating the inside of the banneton with seeds, so that they’re adhered when you turn out the loaf to bake it?
I have been trying to bake the perfect boule for a year now using the Tartine recipe, and this method has yielded better results than all the times I tried baking sourdough with an active starter and levain. I can’t believe it’s taken me a year of baking sourdough and scouring the boards to find out that the perfect oven spring (my ear is HUGE) and holy crumb was made with day old sourdough discard. MIND BLOWN. And THANK YOU! Wish I could share my pic here because it looks glorious. So much easier now that I don’t have to get the timing of both the starter and levain right before I start baking. Such a game-changer. It tastes perfect, too. Slightly sour, just as I like it.
I’m so glad the recipe worked for you!
This was my first ever bread recipe I tried after making my first starter and it is amazing. The recipe is informative and detailed and I love the bread it turns out. I’ve made it so many times that this webpage is permanently opened in my internet tabs on my phone. Thank you for the recipe!
I’m so glad you enjoyed the recipe!
Who would have thought my most successful sourdough loaf yet would be made with my discard!! This came out so great. Didn’t have any whole wheat flour on hand so just used a combination of bread and AP flours. Can’t wait to experiment with this method!
Awesome! Glad your bread turned out well!
So I don’t think I totally understand.. after the 3rd turn and fold I leave dough in container on countertop…after it has risen a bit i shape it and put in fridge. The next morning I take it out of the fridge, put it on the countertop again til I get home from work? Then bake it? Thank u!
I think the directions are pretty clear – after the bulk ferment (which might last all day, depending on the temperature in your room), it does the final proof in the fridge overnight, and then it is baked.
Hi Elizabeth,
It’s so kind of you to share your detailed recipes! I’ve been baking so many delicious bread based on your ‘discard country loaf ‘ recipe. I often play around with the ingredients a little, but the outcome is always great. Also following you on Instagram of course, for more inspiration.
Thank you and happy baking! 🙂
I’m so glad you’ve enjoyed the bread!
Excellent and easy to follow recipe! I mixed in a small amount of dark rye flour instead of whole wheat. Added a tsp of honey for luck. Used starter discard from a starter that had been in the fridge for a week that was brought to room temperature. Did my bulk fermentation in the fridge for nearly 20 hours (!) because I didn’t get round to baking it after proofing overnight. Still got the most amazing oven spring and very very tasty bread.
Wonderful! Glad you enjoyed the recipe.
I’m in the middle of the long rise at this point, but I had to guess at part of your instructions, so I thought I’d ask: it says to “complete three sets of stretch-and-folds”. Maybe that’s as simple as it sounds — stretch it out, fold it back upon itself, and then do that twice more — but please verify that. It seems like less than I would usually do to develop the gluten.
One set of stretch-and-folds involves stretching and folding the dough from four sides. You can find the procedure in Tartine Bread or shown on any number of YouTube videos I imagine.
Well so obviously I did much less than intended. I’m about 4 hours into fermentation at this point. What would you suggest?
Just for posterity:
With Elizabeth’s guidance on “stretch-and-folds”, I went through the process after about 5 hours of the long rise, though it took scrapers and spatulas to do it. I did it again after about another ½ hour, then set the dough in its container outside in about 90° weather. At nightfall, about 3 hours later, the dough had expanded >50% so I proceeded with the recipe as written. Using a hot dutch oven, I baked as described, and ended up with a nice loaf, though with not much add’l rise. The crust is good and it’s moist and tasty. I’ll try again following the directions more closely.
I’d just like to add that although I’m experienced baker, I was not familiar with the term “stretch-and-folds”, so that might bear some explanation or a link in the text of the recipe.
Hi Elizabeth,
I made the recipe to your exact specifications and shall I say, it was one of the best sourdough breads I’ve done so far. I achieved 85-90% rise in the bulk fermentation, but the second rise in the refrigerator was lackluster at best. The result was a somewhat flattened loaf. The taste and texture of the finished loaf were spectacular, but I didn’t get the lofty loaf I was hoping for. Any suggestions? I will try the recipe again this weekend. I did use the cold start for the oven, and will try pre-heating the dutch oven for the next loaf. Thank you!
Hi Mark! Glad the bread was tasty. You shouldn’t expect to get much rise during the overnight in the fridge–the flattened loaf was more likely the result of a shaping issue or *overproofing.* But I’d have to handle the dough to be sure!
Hi, I am assuming that your discard is 100% hydration. Is that correct?
Yes – 20% starter, 40% water, 40% flour
This recipe needs more than 5 stars. It was the EASIEST sourdough I’ve made and it looks beautiful right out of the oven. I’ve already sent the recipe on to family and friends so they can try it. AMAZING recipe.
So glad you enjoyed the recipe!
This was DELICIOUS. Admittedly I was skeptical when I got little rise overnight, but I proceeded and it yielded the tastiest bread. It was gone within hours in my home.
This recipe is fantastic. I made a loaf yesterday using 150g red fife and 350g bread flour. It was so tasty. A little denser than my usual loaf but nice texture and better flavour. Will be doing it again for sure!
I bake a lot of sourdough and a variety of recipes using starter, and always have discard. This is the first recipe I’ve found to bake boules with discard that doesn’t also use yeast. My discard had been sitting in my fridge for over a week. Made two boules, added chopped olives to one and Parmesan and oregano to the other, right before the second fold. Also kept both in the same stainless steel bowls I use for initial mix and folds, simply covering with a piece of syran wrap and a towel. Both were done with BF in about 9 hours. Followed rest of recipe and pulled out of fridge to bake in preheated oven the next morning, and they were delicious! Just a tad tangier than usual, which is fine by me. Will definitely be making more boules using this method in the future. Thank you!
That olive/parm/oregano combo sounds delicious!!!
First time making anything like this… am I right in thinking this loaf take over 2 nights to make!?
I generally start in the morning on day 1 (say, Saturday), and bake the morning of day 2 (say, Sunday). So just one night.
This recipe sounds delicious, and I’ll be making it soon. Could this bread be made in a loaf pan? I’d use an oval-shaped banneton and then a loaf pan for baking. Would I bake at a different temperature? Any suggestions would be so helpful.
Thank you.
If you want a softer crust, you could bake it at 450/425. Others who have commented here indicate that the loaf pan method does work.
Just baked this for the first time and can’t wait to cut into it! Smells and looks absolutely delicious! I did use all bread flour and add in cinnamon sugar mix but that’s the only change I made. I’m so happy to have found this recipe, absolute changer! Thanks for a great step by step tutorial!
So glad you your loaf turned out well!
Absolutely incredible recipe and instructions. I have my loaf cooling now and I cannot wait to cut into it.
I’ve made many sourdough loaves over the years but the last few times I struggled and my loaves never turned out how I wanted them to. Sock put my starter in the fridge for 4 years and left it alone.
Finally I had the urge to try again and I went looking for something a bit less time consuming and one I could use discard with, and then I stumbled on this recipe.
I followed the directions as written and I am just SO impressed. Thank you for a great recipe and all the notes! So helpful. I will definitely be using this one again!
So glad you enjoyed the recipe!
Worked perfectly. Started at 6.30am and finished baking at 9.30pm. Used a 3 day old unfed rye starter. I wish I could post a photo because it doesn’t get much better!
Amazing! Glad it worked well.
Your method is working beautifully for me. I’m back at sourdough after a break while I went keto for a couple years. I am more relaxed and flexible this time around and love not having jars of discard clogging up my refrigerator. When I feed it is only 10-15 grams of starter and am planning ahead more efficiently. Thanks so much for ur guidance.
Glad it’s working for you! I, too, really like having the flexibility of not feeding my starter every day!